Tomatoes are one of the most rewarding crops to grow. You water, care for them, and watch them ripen under the sun.
But here’s a question many gardeners ask—what comes next after picking those plump, juicy tomatoes? Whether you’re a first-time grower or a seasoned green thumb, there’s a lot you can do to make the most of your tomato harvest.
In this post, we’ll walk you through everything you should do after harvesting tomatoes, from sorting and storing to seed-saving and preserving, and even what to do with the leftover plants.
Let’s turn your tomato-growing success into a long-lasting kitchen and garden win!
1. Sort Your Tomatoes First Thing

When you’ve just finished picking tomatoes, sorting them is your first and vital job. Not all tomatoes ripen equally, and some may have bruises or cracks that you overlooked in the garden. Sorting helps you determine which ones to eat right away and which can wait.
Start by separating the tomatoes based on their condition. You’ll probably find three types: the perfect ones, the slightly damaged ones, and the ones that are too far gone.
Don’t worry, none of your hard work has gone to waste! Even overripe or damaged tomatoes can still be used for sauces or compost.
Here’s a breakdown to help guide you:
| Type | What They Look Like | Best Use |
|---|---|---|
| Perfectly Ripe | Smooth skin, firm, deep red (or yellow) | Fresh eating or storing |
| Slightly Damaged | Minor cuts, bruises, soft spots | Cooked recipes or sauces |
| Overripe | Very soft, leaking juice, bursting skin | Compost or immediate cooking |
Sorting might feel like a chore, but it’s your ticket to longer-lasting tomatoes and less waste.
2. Store the Right Way (Don’t Refrigerate Yet!)
After sorting, storage is the next critical step. Many people make the mistake of tossing tomatoes straight into the fridge, but that can ruin the flavor.
Tomatoes don’t like the cold. It dulls their taste and messes with their texture, making them grainy or mealy.
Instead, follow these simple storage rules:
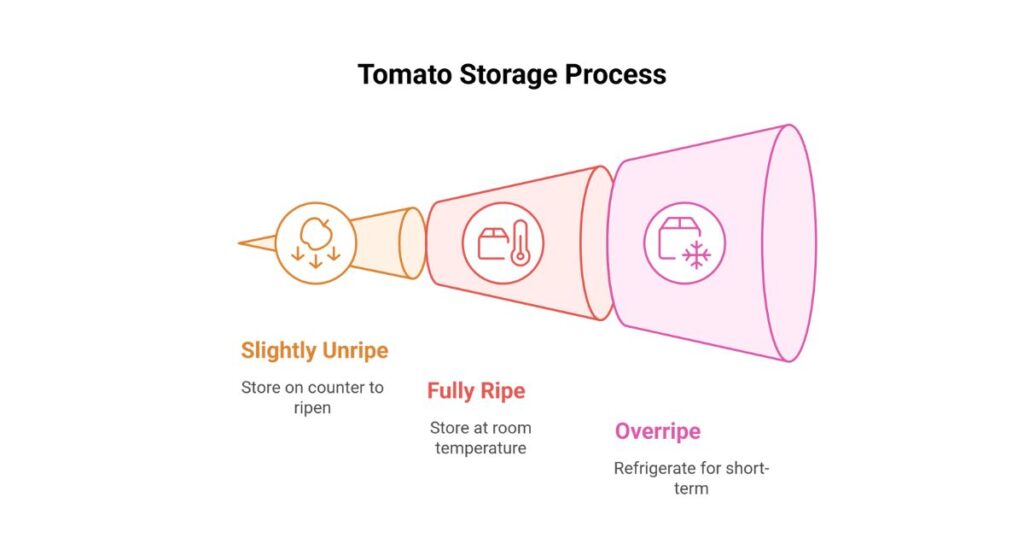
- Slightly unripe tomatoes: Keep them on the kitchen counter, away from direct sunlight, and let them ripen naturally.
- Fully ripe tomatoes: Store them at room temperature. Place them stem-side down to prevent moisture from seeping in.
- Overripe tomatoes: If you can’t use them the same day, refrigerate for up to 2 days. Bring them back to room temperature before eating.
Think of storing tomatoes like babysitting fruit with prominent personalities. If you treat them right, they’ll reward you with bold, garden-fresh flavor in every bite.
3. Wash Tomatoes Only Before Eating
Here’s something you might not expect: don’t wash tomatoes immediately after harvesting. It seems like the hygienic thing to do, but moisture can quickly become your enemy.
Moisture trapped near the stem or under the skin encourages mold growth and softens the fruit too quickly. Instead, store the fruit dry and clean it only when you’re ready to eat or cook it.
Here’s a quick checklist for handling post-harvest washing:
- If they’re dusty: Wipe gently with a dry or slightly damp cloth.
- If wet from rain or dew, lay them on a dry towel until completely dry.
- Never soak them or store them wet.
The key here is moisture management. Keep them dry, and your tomatoes will stay firm and flavorful longer. Save the rinse for right before mealtime.
4. Plan What You’ll Do With the Tomatoes
You’ve got baskets full of tomatoes—now what? Having a plan can save you from watching your precious harvest spoil on the counter.
Tomatoes are incredibly versatile, so whether you want to preserve, share, or enjoy them fresh, you’ve got options.
Here’s a simple way to decide:
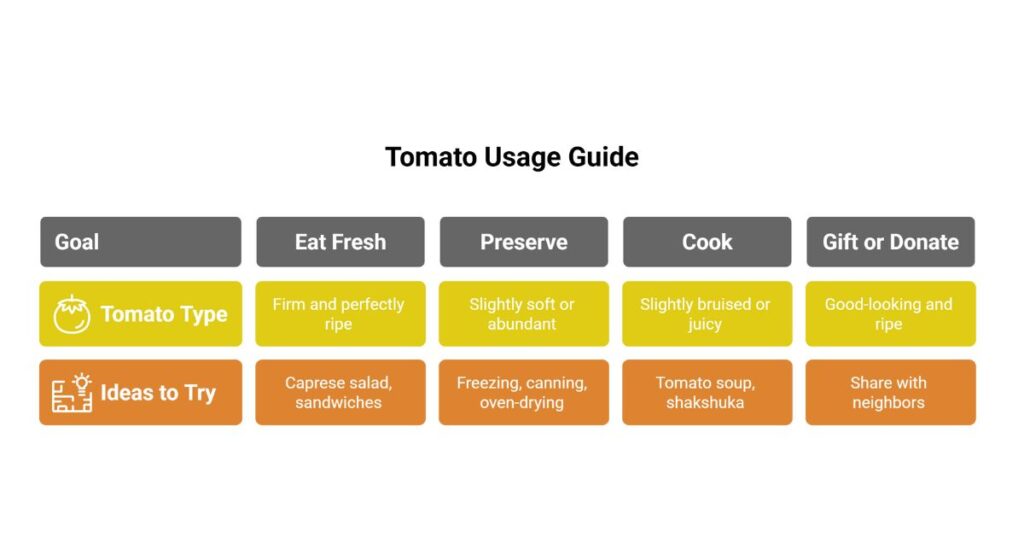
| Goal | Tomato Type Ideal For It | Ideas to Try |
|---|---|---|
| Eat Fresh | Firm and perfectly ripe | Caprese salad, sandwiches, bruschetta |
| Preserve | Slightly soft or abundant | Freezing, canning, oven-drying |
| Cook | Slightly bruised or juicy | Tomato soup, shakshuka, pasta sauce |
| Gift or Donate | Good-looking and ripe | Share with neighbors or local food banks |
Once you break it down like this, it’s easy to avoid waste and get creative with your cooking. Every tomato has a purpose, match it with the right idea!
5. Freeze for Easy Storage
Freezing tomatoes is a lifesaver when you have more than you can handle. It’s quick, easy, and beautifully preserves flavor. Best of all, you don’t even need to blanch them first.
Here’s how you can freeze tomatoes step by step:
- Wash and pat them dry thoroughly.
- Remove the stem and core if desired.
- Slice, dice, or freeze whole—your choice!
- Please place them in zip-top freezer bags or airtight containers.
- Label it with the date and store it flat in the freezer.
Simple tips:
- Don’t overstuff the bags—flatten them for better stacking.
- Frozen tomatoes are best for cooking (sauces, soups), not for raw use.
- Tomato skins will slip right off after thawing; no need to peel before freezing.
Freezing gives you tomato power all year, perfect for winter comfort meals.
6. Try Water Bath Canning (Great for Sauce Lovers)
If you’re a fan of homemade pasta sauces or soups, canning tomatoes is one of the best post-harvest steps. Water bath canning allows you to preserve that sun-kissed tomato taste for months.
You’ll need:
- Ripe tomatoes
- Canning jars with lids
- A water bath canner or a large pot
- Lemon juice or citric acid (for safety)
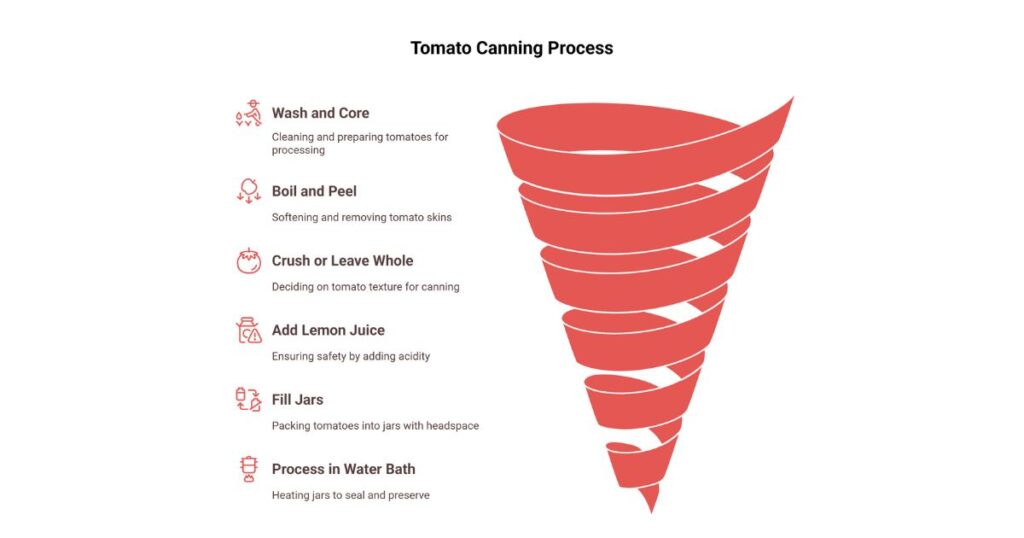
Here’s a basic process:
- Wash and core your tomatoes.
- Boil them to loosen the skins, then peel.
- Crush or leave your call whole.
- Add lemon juice to each jar (1 tbsp per pint).
- Fill jars with tomatoes, leaving headspace.
- Wipe rims, seal with lids, and place in boiling water.
- Process jars (usually 35–45 minutes, depending on your altitude).
Once cooled, label and store in a cool, dark place.
Canned tomatoes are perfect for:
- Spaghetti sauce
- Chili
- Tomato bisque
- Shakshuka
With water bath canning, you’re bottling your garden for future dinners. It takes effort, but the rewards last for months.
7. Make Homemade Sun-Dried Tomatoes
Sun-dried tomatoes are a delicious way to extend tomato season. They bring intense, sweet-savory flavor to everything from salads to pasta, and making them at home is easier than you think.
You can dry them using the sun, an oven, or a food dehydrator. The goal is to remove most moisture while keeping that deep tomato flavor locked in.
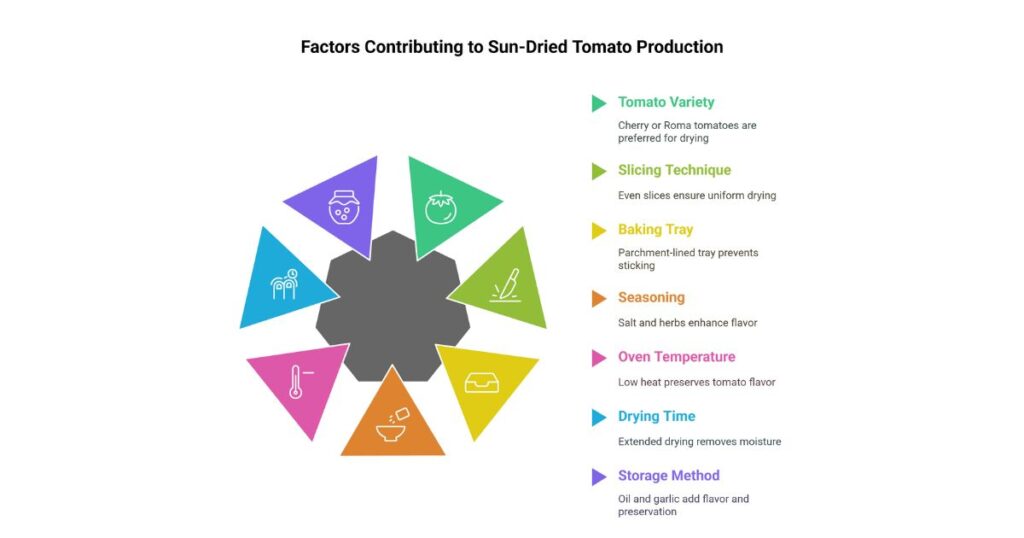
Here’s a quick method for oven-drying:
- Slice tomatoes evenly (cherry or Roma work best).
- Place them cut-side up on a baking tray lined with parchment.
- Sprinkle lightly with salt and any herbs you love (oregano, basil).
- Dry in the oven at 200°F (95°C) for 4 to 8 hours.
- They’re done when leathery but still a bit pliable.
Store dried tomatoes in an airtight container or jar with olive oil and garlic for extra flavor. If packed in oil, keep them in the fridge.
They’re perfect for snacking, tossing into pasta, topping pizzas, or adding to sandwiches for a bold, tangy twist. A small batch goes a long way!
8. Save the Seeds for Next Season
If you loved the tomatoes you grew this year, why not grow them again next year, for free? Saving tomato seeds is simple, sustainable, and strangely satisfying.
Here’s how to do it step-by-step:
- Choose the best-looking tomato from a healthy, productive plant.
- Cut it open and scoop out the seeds into a glass or jar.
- Add some water and let it sit for 3–4 days. This ferments the seed gel, which is essential for good germination.
- Stir daily to prevent mold from forming on top.
- After fermentation, rinse seeds thoroughly in a fine mesh strainer.
- Spread on a paper plate or coffee filter to dry completely (not paper towels—they stick!).
- Once dry, store in a labeled envelope or jar in a cool, dry place.
With saved seeds, you cut costs and keep a good tomato variety in your garden. Plus, it’s a great way to pass down favorites to family and friends!
9. Clean Up the Garden Bed
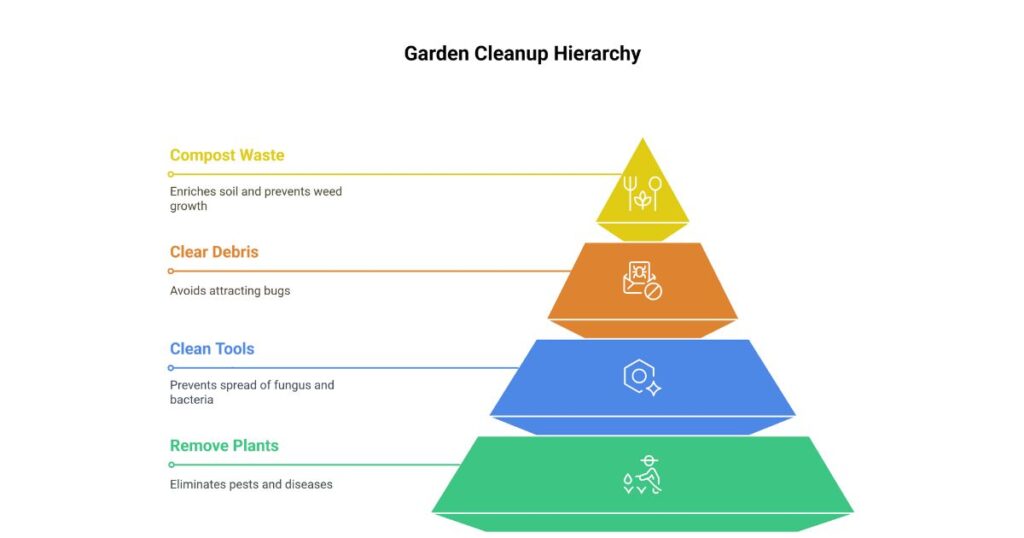
After the last tomato has been picked, your garden still needs attention. Cleaning up properly now means healthier soil and better plants next season.
Here’s what you should do before calling it a day:
- Remove all tomato plants, including the roots. Leaving them behind encourages pests and diseases.
- Pull up stakes, cages, and ties and clean them with a mild bleach solution to prevent fungus or bacteria from spreading.
- Clear any fallen or rotting fruit from the soil to avoid attracting bugs.
- Compost healthy plant waste, but trash any diseased stems or leaves.
Bonus tip: After cleaning, spread a layer of compost or mulch to enrich the soil and prevent weed growth.
This is your garden’s reset button. A little work now will save you a lot of trouble later and set you up for a thriving, growing season next year.
10. Rotate Your Tomato Spot Next Season
Tomatoes are heavy feeders. They soak up nutrients fast and are prone to soil-borne diseases like blight. That’s why rotating your tomato planting spot every season is smart.
Why it matters:
- Prevents soil disease buildup
- Restores soil fertility
- Gives your plants a healthier start
Follow this rule:
Don’t plant tomatoes (or other nightshades like peppers and eggplants) in the same soil two years in a row.
Try rotating with these garden-friendly options:
| Replace With | Benefits |
|---|---|
| Legumes (beans, peas) | Add nitrogen back into the soil |
| Leafy greens (lettuce) | Light feeders reduce soil strain |
| Root crops (carrots) | Improve soil structure |
Rotating isn’t just about switching spots—it’s about working smarter, not harder. Your garden will thank you.
11. Turn Extra Tomatoes Into Homemade Compost
What do you do with tomatoes that are too squishy, buggy, or un-tasty? Compost them! Tomatoes are full of moisture and nitrogen, two things your compost pile loves.
Here’s how to make the most of your rejects:
- Chop or smash the tomatoes to speed up decomposition.
- Mix them with carbon-rich “brown” materials like dried leaves, shredded paper, or straw.
- Turn the pile every few days to keep it aerated.
- Avoid adding tomato plants that have signs of disease or pests.
Quick compost tips:
- Too many tomatoes = slimy pile. Balance them with dry materials.
- Avoid adding large tomato chunks, as they break down more slowly.
- If seeds sprout in your pile, toss them in deeper or cover them with more material.
Homemade compost = better garden next year. It’s like recycling, but tastier.
12. Keep a Tomato Journal for Next Year
If you want to grow better tomatoes every season, start keeping a journal. It doesn’t have to be fancy. A simple notebook or a Google Doc will do the trick.
What to include:
- Dates of planting, harvesting, and first frost
- Varieties you grew and how each performed
- Flavor notes, which ones tasted best?
- Issues you faced, like pests, diseases, or weather problems
- What would you do differently next year
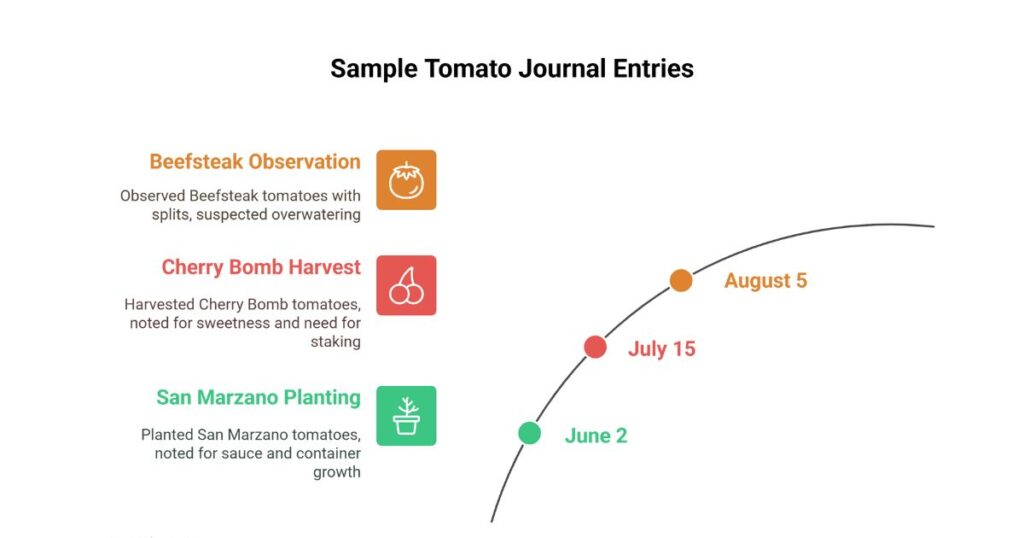
Here’s a sample journal entry:
| Date | Variety | Notes |
|---|---|---|
| June 2 | San Marzano | Great for sauce, grows well in containers |
| July 15 | Cherry Bomb | Super sweet, lots of fruit, needs staking |
| Aug 5 | Beefsteak | Too many splits, maybe overwatered? |
A tomato journal is like a time machine for your garden. It helps you avoid repeating mistakes and build on your success. You’ll feel like a pro when spring rolls around again.
Conclusion: Enjoy Every Tomato You Grew
Harvesting tomatoes is one of the best moments in gardening, but what you do afterward makes all the difference. With a bit of care and planning, you can extend your harvest’s life, flavor, and usefulness for weeks (or even months).
Every step you take, from sorting and storing to freezing and canning, helps reduce waste and increase the joy you get from your garden.
Composting leftovers, saving seeds, or planning crop rotation are all ways to set yourself up for success next season.
Your tomatoes gave you their best. Now it’s your turn to make the most of them. 🍅
FAQs
Q1: Should I refrigerate freshly harvested tomatoes?
No, unless they’re overripe. Keep them at room temperature to maintain flavor and texture. Refrigerate only if necessary, and bring them back to room temperature before eating.
Q2: How long do fresh tomatoes last on the counter?
Depending on ripeness, 5 to 7 days is standard. Slightly underripe tomatoes last longer.
Q3: Can I freeze tomatoes without peeling them first?
Yes! Just wash, core, and freeze them whole or chopped. If needed, you can peel them after thawing.
Q4: What’s the easiest way to preserve tomatoes for winter?
Freezing is easiest. Water bath canning is also popular for long-term storage of soups and stews.
Q5: How do I know if a tomato is too far gone to eat?
If it’s mushy, leaking, or smells sour, it’s best to compost it. Trust your senses.
Q6: Can I plant tomatoes in the same spot next year?
No. Rotate the planting area yearly to prevent soil diseases and nutrient loss.